

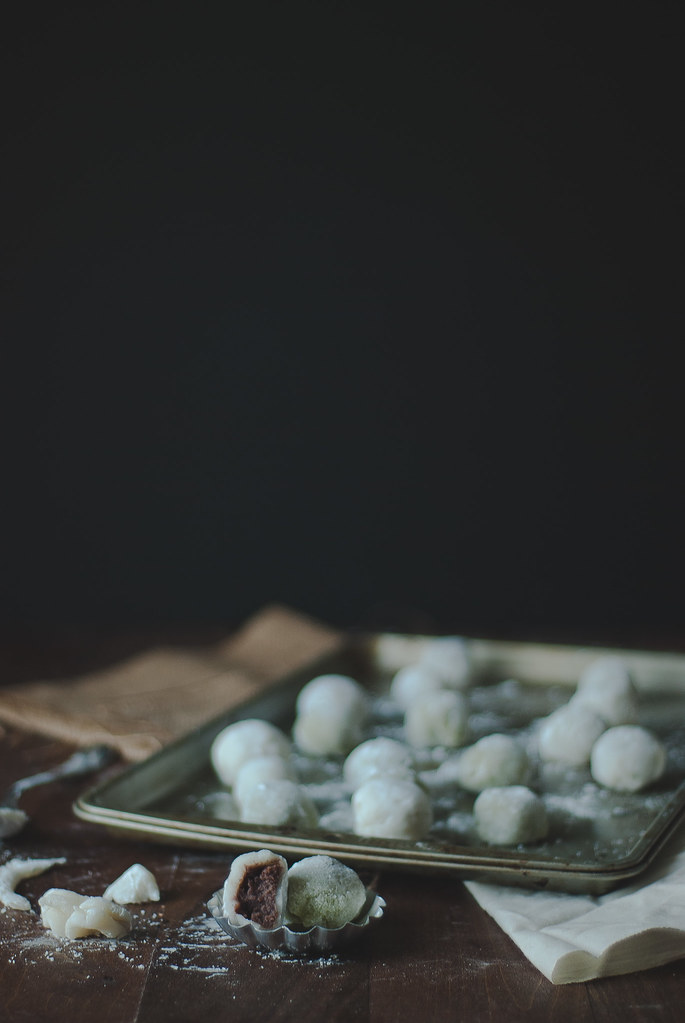
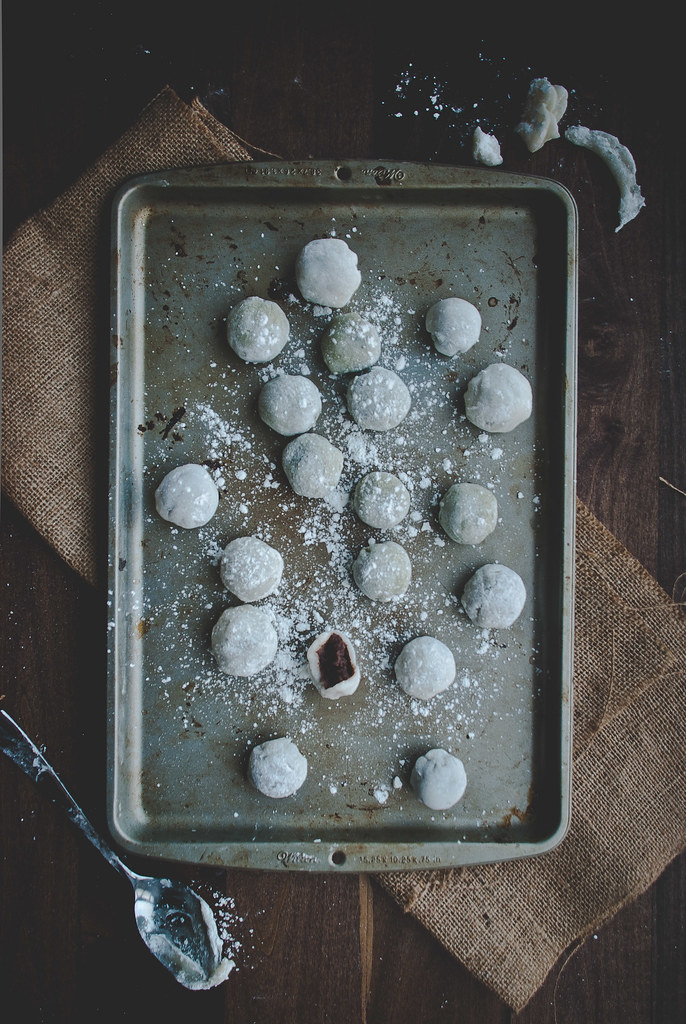
Normally, I’m all about the Super Bowl finger foods. Carbs wrapped in cheese wrapped in carbs, usually mini, often involving some combination of “Panko-crusted” and “stuffed” and “pizza”? It is my thing. (Football, not so much.) But, either because Bowl #2 and I both had somewhat hectic weeks, or just because January has felt very long and very January, I just felt like a gentler, quieter dessert was in order. One that you can stuff yourself full of and just feel comforted, instead of immobilized. And maybe that you ate two days’ worth of calories in 30 minutes… instead of four. So I made these red bean mochi balls. (I know, even though I just made these. Does that mean it’s topical? Sorry for being a one-note these days — I promise I’m moving on to non-mochi edibles and potables after this.)
 ]
]
Out of curiosity, I tried a few different methods for the mochi wrappers. The first was just baking it as per the recipe I posted last week, but in two separate pans so that the layer would be thinner, and for less time (about 35-40 minutes). The second was the method I’ve seen almost universally for mochi balls elsewhere — by microwaving the mochi on high for a few minutes, giving it a stir, and going to town with it. Maangchi and use real butter both post great tutorials and recipes for this method. And last, just because I was curious whether you could do the microwave method by steaming the mochi instead of microwaving, I used that recipe, but baked it in a bowl covered in the oven at 350 degrees for 15 minutes, then stirred and prepared it as per the rest of the instructions.
My findings were that all more or less work. Mochi is just that agreeable! More specifically, though: (1) The coconut milk (baked)recipe: Taste-wise, the best. Texture-wise, perhaps the worst. Because it contains almost twice the amount of liquid that the other recipes do, it’s very soft, so wrapped around red bean filling, it tastes more like a Chinese red bean soup dumpling (tangyuan) than the mochi balls I’ve had from the store. It was also the most difficult to get the mochi to hold its shape around the red bean filling. (2) The microwave recipe: Taste-wise, the worst. Texture-wise, the best, and prep-wise, the ease of prep was unbeatable. That stuff comes together in literally 5 minutes. Literally. Two, if you’re fast. (3) And the steamed version was somewhere in between — likely the easiest to work with, but softer in texture than the microwaved version (which may be preferable, the microwave version could be a bit too tough/chewy for some folks) and still lacking in taste compared to the regular coconut milk version.
So for ease of preparation alone, I’d probably go with the microwave method, unless you don’t have a microwave, in which case, feel free to experiment between baking on low heat for a long period of time or steaming on high heat for shorter. (I’m also curious as to what would happen if you prepared the microwave recipe with half coconut milk and half water? I didn’t test enough after all! Drat!)
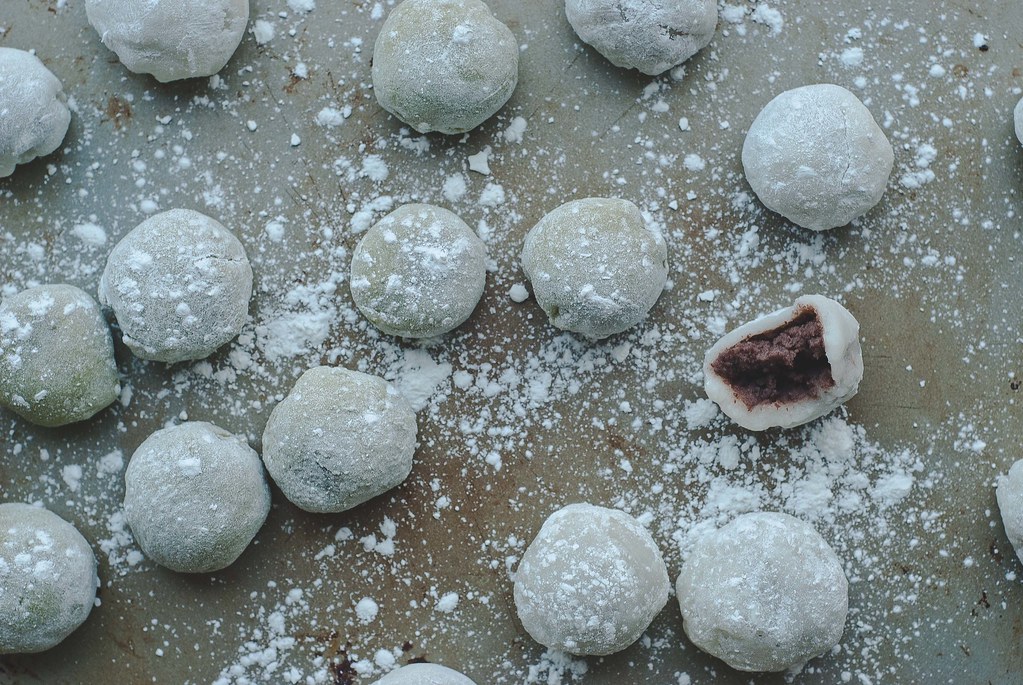
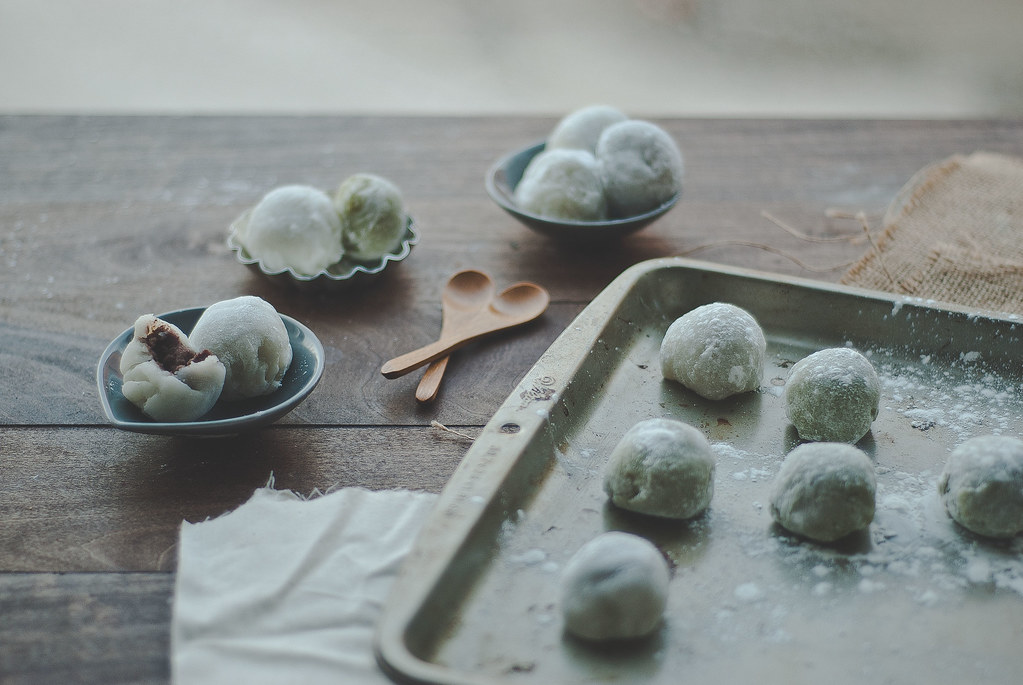
Lastly, note that my recipe is for half green tea mochi and half plain — combine the two sets of ingredients for mochi below if you just want to make one batch (and double the matcha powder if you want all green tea). And in terms of time, the red bean filling will need overnight prep (soaking the beans) and several hours to come together, as well as an additional few hours for freezing if you want the red bean balls to be easier to work with when wrapping them. Enjoy. 🙂
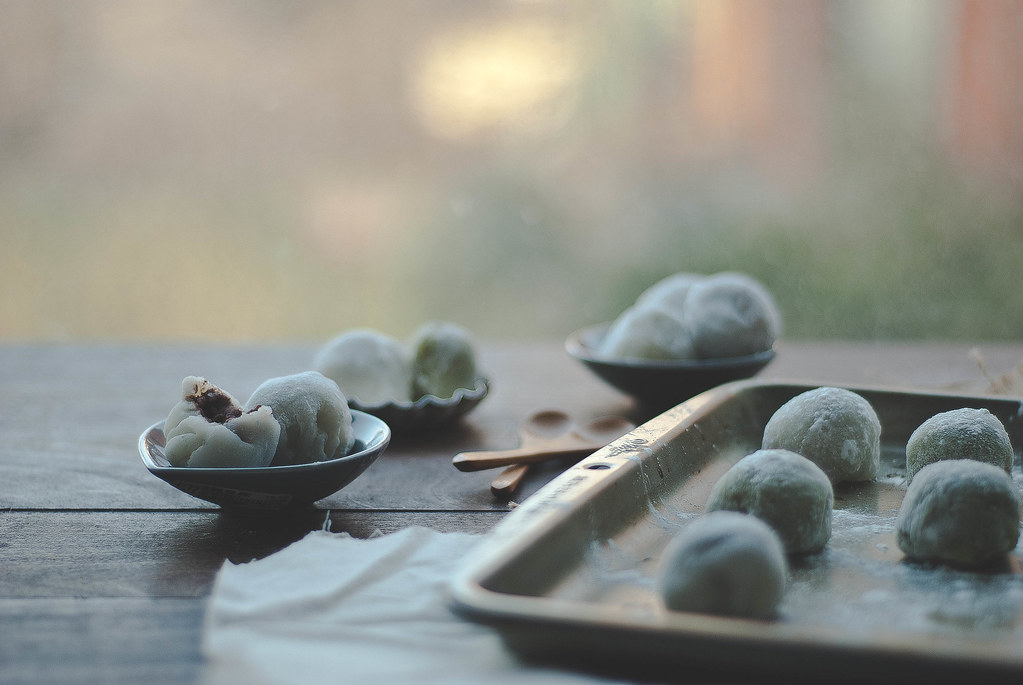
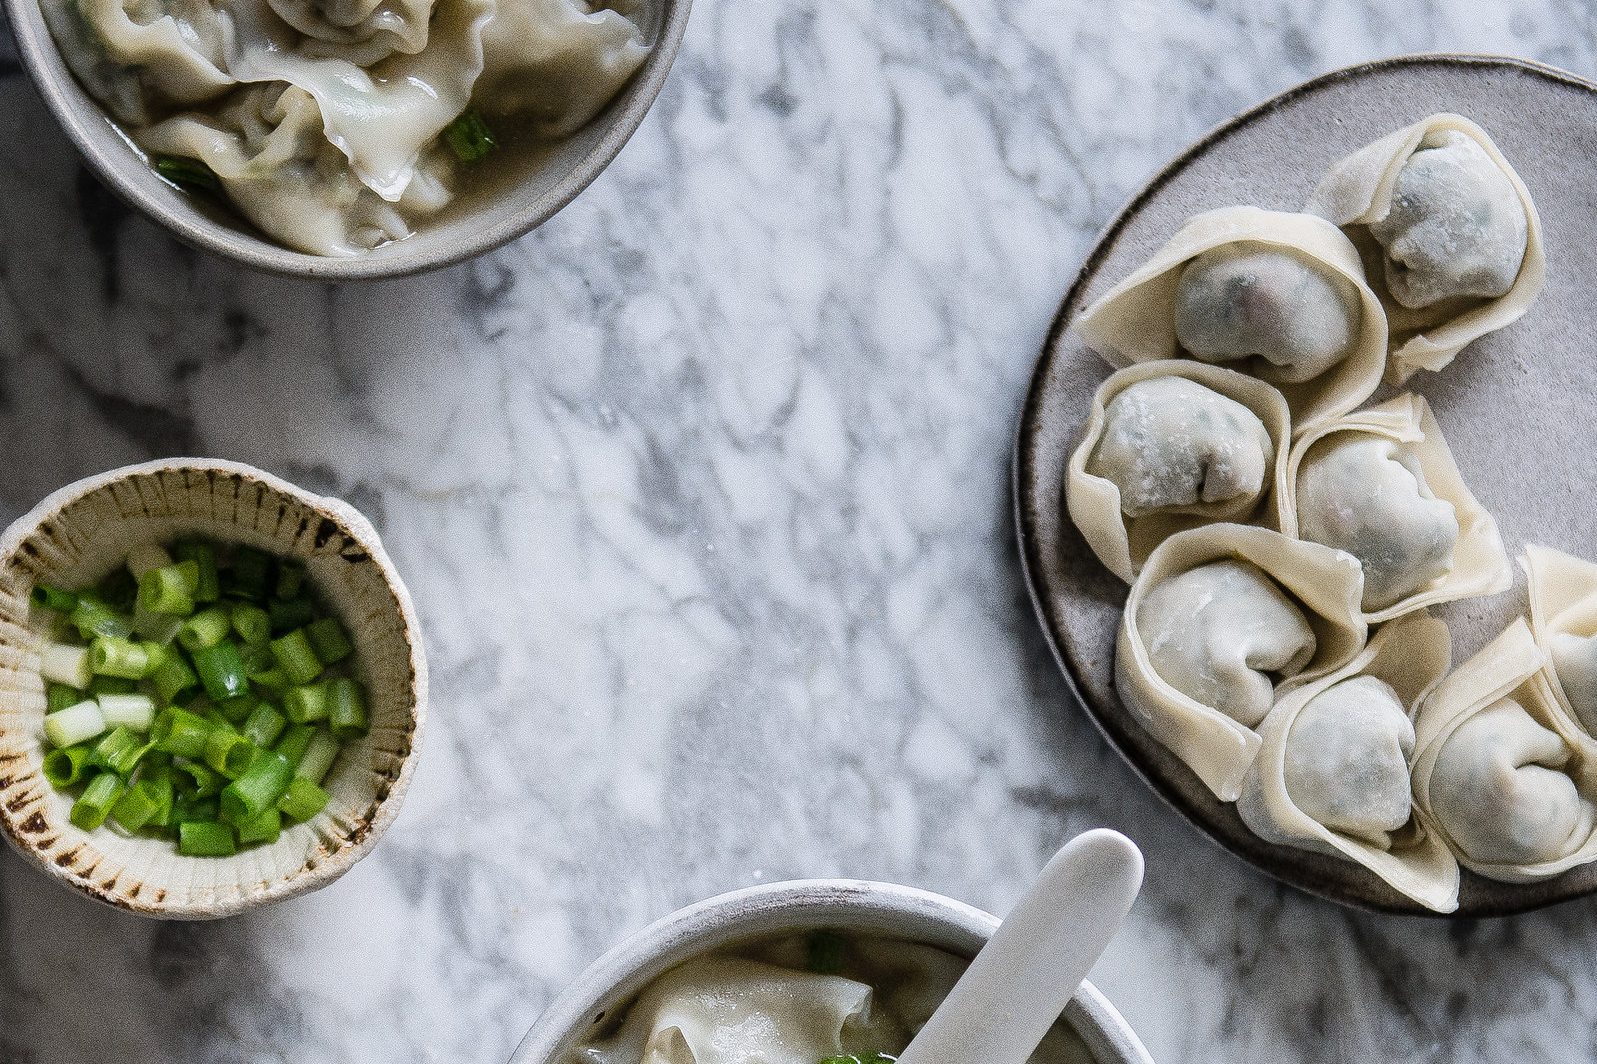
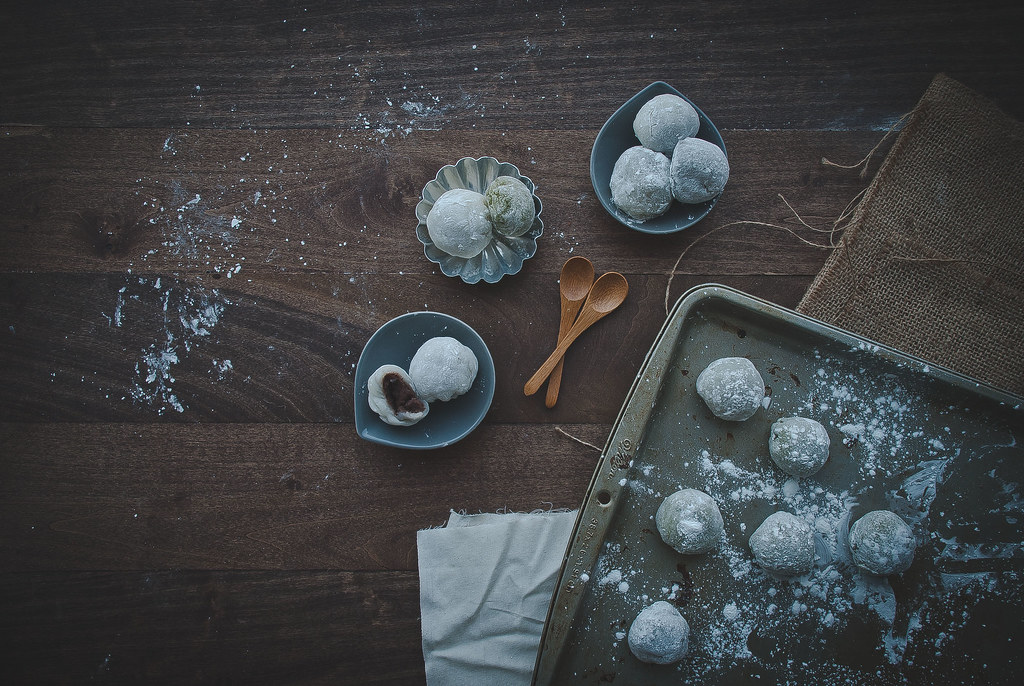
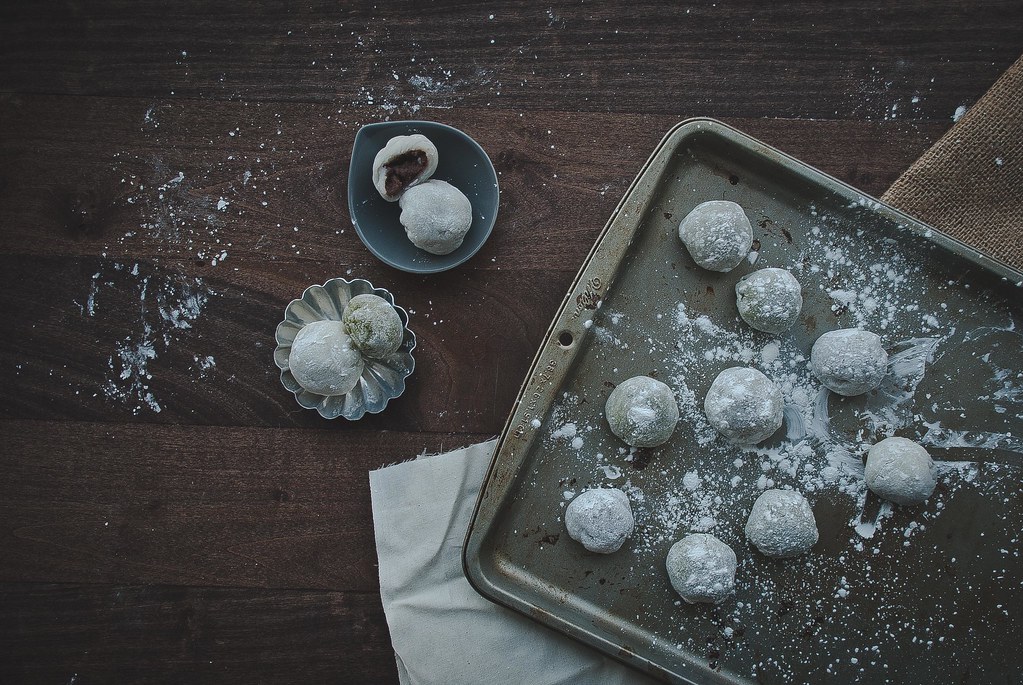
Red bean mochi balls.
Mochi wrapper recipe more or less identical to recipes by Maangchi and use real butter (see their posts for step-by-step tutorials!) I divided the recipe into two halves for one batch each of green tea mochi and plain mochi — to make just one large batch, follow their recipes instead.
Ingredients
- for the red bean filling:
- 1/2 cup red beans or azuki beans, dry
- 1/3 cup sugar (or more, if you’d like it sweeter)
- water
- optional oil, for frying
- for plain mochi wrappers:
- 1/2 cup sweet rice (mochiko) flour (if buying in stores, look for Koda Farms brand)
- 2 tbsp sugar
- 6 tbsp (3/8 cup) water
- 3–4 tbsp potato starch or cornstarch for dusting
- for green tea mochi wrappers:
- 1/2 cup sweet rice (mochiko) flour
- 2 tbsp sugar
- 1/4 tsp matcha powder
- 6 tbsp water
- 3–4 tbsp potato starch or cornstarch
Instructions
- For the red bean filling: Soak the red beans in plenty of water for at least 2-3 hours, if not overnight. Rinse and drain. Next, briefly blanch the beans to clean them. Place the beans in a large pot and fill with enough water to submerge the beans by an inch or so. Bring the water just to a boil, then drain and rinse again.
- Replacing the beans in the pot, fill with just enough water to cover the beans and bring it back to a simmer. For the next hour or two, you will need to let the beans simmer consistently, adding about 1/2 cup of water each time the water boils down to keep the beans submerged. You don’t need to stir, just keep the water just covering the beans.
- After an hour, test a bean by mashing it with a spoon or your fingers. If it splits as halves, keep cooking. If it smushes easily, it’s done simmering.
- Now, you can drain the beans, then add it to a food processor with the sugar and process on high until smooth. If you don’t have a food processor or blender, just drain the water, add the sugar directly to the pot, and keep cooking over low heat, mashing as you would mashed potatoes.
- You can use it if you like at this point, but I find mine is generally a bit too liquid after this step. If you do too, warm one to two tablespoons of oil in a pan over medium-high heat. Pour the paste into the pan and cook, stirring constantly, over medium heat for 2-3 minutes, or until the paste thickens into a firm, mold-able paste. Also, taste-test to make sure it’s at the sweetness you prefer.
- When you’re happy with the paste, let cool, then scoop it and roll it into small balls, about 3/4-inch in diameter or less. Place on a baking sheet and cover with plastic wrap, then set aside. (Note: You can freeze these if you like, which will make wrapping them easier, but if you do, you will need to let the mochi balls rest for about 20-30 minutes before eating, to let the red bean paste thaw.)
- For the mochi wrappers: For the plain mochi, sift together 1/2 cup mochiko flour and 2 tbsp sugar, then pour in the water and stir until combined. Microwave on high for 1 minute, covered. Most recipes suggest covering with plastic wrap, but something about microwaving plastic wrap skeezes me out. I just covered the bowl with a plate. After microwaving, stir vigorously for about 1-2 minutes to develop chewiness. The paste will likely be a big glob and somewhat hard to work with — just stir it as best you can. (*Note:* If you don’t have a microwave, bake, covered, at 350 degrees for 15-20 minutes. If the dough doesn’t come together when stirred, steam it for 5-10 minutes longer.)
- Line a baking sheet with parchment paper and spread a generous amount of cornstarch (I used about 3-4 tablespoons) over it. Scrape the ball of mochi dough onto it and flatten with your fingers. I wet my hands beforehand so that the dough didn’t burn me and didn’t stick. Once you’ve spread it into about a 6×6 square, sprinkle cornstarch over both sides and cut into 9 pieces. Stretch one square, then take one ball of red bean filling and place it in the middle. (*Note:* For mochi ice cream instead of red bean mochi balls, see Notes!) Stretch edges gently to meet on the underside of the ball and pinch or pleat together as best you can until it holds together. Dust with extra cornstarch and set aside, covered. Repeat until you’re out of mochi.
- For the other batch, whisk 1/2 tsp of matcha powder into the flour and sugar, and otherwise repeat steps 9 and 10. If you’ve frozen the red bean filling, let the mochi balls rest and thaw for about 20-30 minutes — otherwise, enjoy immediately.
Notes
For the red bean paste, you can choose to strain out the biggest pieces of bean skin if you want to. Do so by pushing the mixture through a fine mesh strainer. I did one batch straining the skin and one batch with skin intact — the taste difference was negligible, if discernible at all.
For mochi ice cream, omit the red bean paste and use ice cream balls instead! Scoop ice cream into 1-tbsp balls and space evenly on a baking sheet. Replace in freezer and let chill until hard. Use in place of the red bean paste balls. Return to freezer after forming the mochi balls or enjoy immediately!
Lindsey
Holy sh… these photos are super pretty! I will make these one day, for sure! xo
tworedbowls
Thank you, friend! <3 Ooh, isn't it awesome that they're naturally gluten-free, by the way? 😀
thelittleloaf
I absolutely love the light in these photos, it’s almost slightly eerie but in a beautiful way. This recipe looks fabulous too!
tworedbowls
Oh thank you, Kate!!! I’m so happy to hear that, especially because I was racing the winter light when I shot these and thought they were a bit dark in the end. (I mean. This was totally on purpose.) Thanks for the kind words 🙂
molly yeh
i love everything about this post. those photos!! amazing. and mochi… i love mochi so much, please keep writing about it. i have always wondered about if there is a better way than microwaving, and then i saw that you baked your itty bitty mochi and thought that was a great idea! but that is good to know about the texture…
ok soon, i will suck it up and make a mess out of my kitchen and make mochi so that i can use up all this red bean paste that i have!
tworedbowls
I wanted to know whether I could skip the microwave too! It’s possible that I just didn’t let the baked version cool enough to develop more chewiness? The taste was just so much better that I’m kind of torn. I think the coconut milk goes a long way in cutting the kind of bitterness that plain mochiko flour can have sometimes. But now I’m just wondering if I can use the proportions for microwaving/steaming it, but with half coconut milk or something instead of all water? (I have no idea why I am so fixated on making this the most drawn-out experiment ever.) IDK IDK MOLLY! If you try a variation, let me know how it goesss 🙂
Also OH my god mochi is so messy. I have no idea why I didn’t think it would be. But getting that stuff off bowls/hands/everywhere is like……something out of Alien. Better simile forthcoming.
Erika
So I need some Mochi in my life.. because “Holy Red Beans” that sh.T looks amazing!
tworedbowls
Hahaha “holy red beans”! Erika you are such a treat. 🙂 Thank you so much!!
erika
Ooh I love these fancy asian recipes! If it were up to me, I’d say bring on the mochi for the next few days, weeks, months, if you feel like it! I actually used to hate mochi (family friends used to eat the green tea ice cream mochis from Trader Joes and I thought the outside tasted like cardboard) but now I love it and am totally craving it!! Thanks for the tips on making it–hopefully it will go smoothly when I try, one day!
On another note: your photos. Looking SO fab!
PS. I know you’re into Korean food and I think mochi are originally Japanese, right? A cursory google search led me to “korean-style mochi”–do you know what the difference is between Korean and Japanese mochi?
tworedbowls
Yaayy, I’m so glad I’ll have at least one reader in my new mochi-themed blog. Lol. I have no doubt at all you will do spectacularly if or when you try it! 😀 It was really SO easy, I was frustrated with myself when the directions seemed to just go on and on….
As for the Korean v. Japanese versions, it’s funny. I actually have no idea. Maangchi’s is definitely the Korean version (called chapssaldduk or ddeok or tteok or however you feel like Romanizing it) and I personally thought the ones I made tasted like the chapssaldduk that I’d had in Hawaii, but B2 thought that they tasted more Japanese. But I don’t even know how the Japanese recipe differs. haha. And on top of that the paste I used was a Chinese recipe! So I’m all Asian-confused. (I’m allowed to do that if I’m Asian….right?)
carey
So I’ve kind of actively avoided learning how to make red bean paste myself because I’m afraid that once I have the power to do so, I will put it on/in EVERYTHING. And steamed red bean buns would lose their I’m-out-at-a-restaurant-let’s-order-this-special-treat status. (Then again, that would also be a great opportunity for me to bust out the mondo bamboo steamer I got for my birthday a couple years ago. I’m not even sure where that thing is…..probably under my bed. Ugh, tiny apartment living!) And I’d also have to put it inside mochi, obv, since I now know how to make that too! (:
tworedbowls
OMG I just ordered a bamboo steamer! Red bean steamed buns were in my plans to try this past weekend (for SB, if it went well!), but me and FedEx are not getting along >:( Boo. Let me know how it goes if you try it :D! I thought this paste was simultaneously more addictive and way more … clean? than the restaurant and shop versions, if that makes sense? A much more pure red bean taste. And one of those things that’s like — wait, really? Just three ingredients? And I really just made this myself? Definitely give it a try! 🙂
mandylee@ladyandpups
omg hello mochi-lover, can we be bestfriend? I. am. obsessed. with anything that’s made with sticky rice! and i mean everything! I think you’re gonna love a recipe im working on this week – sticky rice soup dumpling with liquid black sesame filling. you know what im talking about.
tworedbowls
Mochi-friends4L!!!! Yessss!! And o. m. g. Drool me out the door, Mandy, I cannot wait for that black sesame soup dumpling. I’m so pumped. Watch out or I might just show up in Beijing at your door demanding to taste-test!
Shikha la mode
I’m so impressed that you made mochi. It looks like a pretty long process, one that I don’t think I could do without someone helping me. I love Asian desserts, so this looks doubly delicious!
tworedbowls
Noooo you should definitely try it! I think you could do it. I was kind of frustrated with how long my directions ended up, because it’s really a much easier recipe than it looks. I think it would have been helped by process photos … that I didn’t take. Alas. It’s true that the red bean paste is a bit time-consuming, though. But I believe in you, Shikha! 🙂
Jessica (Coco/Mingo)
Nope, I can never have too many mochi recipes!! This post is making me sooo craving for this! Coconut milk? Hmm..that sounds good! But I’ll take your word for it…and I’ve contemplated doing the whole microwaveable mochi, but never thought it would end up as great…Anyway, you’ve inspired me to tackle the whole mochi-making thing…I will do it soon! The craving cannot wait! ahh!!
tworedbowls
It definitely wasn’t as great 🙁 but so easy that it was hard to go for anything else! If I’m going to be eating it on its own, though, the coconut milk version is by far the best. Sooo yummy. 😀 Yay, let me know how it goes if you try it, Jess!! <3
Allison (Spontaneous Tomato)
Oh man, I love that you made mochi and then made red bean-filled mochi right afterwards—so ambitious! And I love your photos. And I love that you tested out three different ways to make these and reported back! Thank you!
It’s too bad the taste-wise and texture-wise winning mochi-making strategies didn’t line up… but this is all really good to know and really inspiring. I am mentally bookmarking this recipe (I don’t even need to actually bookmark it because I am so impressed; I will not forget to come back to this for some guidance whenever I finally get around to making some kind of something-filled-mochi myself!).
tworedbowls
Ha, I guess I was on a mochi kick!! I feel like making mochi is a little like making fresh pasta — part of you is just amazed that so few ingredients can result in a homemade version of something you accept as difficult and generally storebought. And I’m so glad that my experiments were actually useful! As I was typing them out I was thinking, I really hope I’m not the only one who thinks this was an interesting endeavor… hehe. Aw, I’m honored to be a resource to you, Allison! I have no doubt you’ll come up with something fantastic when you turn to this yourself. Can’t wait.
kaitlinsarahm
Love your photos, so beautiful! I wish I could edit like that! Any tips you have I would absolutely love 🙂
tworedbowls
Thank you so much, Kaitlin! Hmm, I don’t know if I have any specific tips off the top of my head — do you have particular questions? Definitely shoot in RAW format if you can, and invest in a photo-editing software like Lightroom or Adobe Acrobat. Feel free to shoot me an email if you want to talk photography :):) tworedbowls at gmail dot com!
girlinbrogues
I love mochi!! I’ve never seen anyone attempt it on a blog – it’s good to see someone brave enough to!
Saskia
tworedbowls
Haha aw, so kind, Saskia!! Thank you! It really wasn’t very hard 🙂 You should try it sometime if you feel up to it, and see if you don’t believe me 😉
Cate @ Chez CateyLou
These are so pretty! I’m loving the mochi recipes – it is so much fun to read about a food that I have never made! Both mochi and red-bean anything fit the bill!
tworedbowls
Yay!! I’m so glad to read that, Cate! I was kind of wondering whether this would be a total snoozefest for some, so I’m so happy that you enjoyed it 🙂
Alanna Taylor-Tobin
I’m so glad to have found your site (thanks, Twitter!). I LOVE red bean paste, and mochi – it never occurred to me that you could just MAKE these in your kitchen! Brilliant! And your photos are stunning! Looking forward to ogling more! 🙂
tworedbowls
Alanna! That’s so kind of you!! I actually just recently started lurking on your beaaautiful blog (I think I’ve been pinning your photos for weeks without knowing who it was, silly me) so I’m so thrilled to see you over here 🙂 I’ve been meaning to leave you a comment because I love your work. Yay for making blog-friends! Looking forward to following you too.
Sarah @ The Woks of Life
argh! my sister, the mochi-loving fiend that she is, would LOVE this recipe, and your photos are gorgeous. I’ll have to share this with her.
Thanks so much for stopping by and leaving such a lovely comment on our blog. Sometimes its hard to stay motivated when it seems like the whole world has been decidedly NOT commenting on your blog posts. Plus, now i’ve discovered your blog as well!
tworedbowls
Aw, I so feel you on that. But what you guys are doing is seriously awesome (I’m still not over how wonderful it is that you blog as a family!) so you should be super proud 🙂 And if you ever want to talk blog, feel free to shoot me an email if you want to! I’m still finding my way too. So glad to have found you, Sarah!!
Trisha
never tried making this at home, but my mum always used to buy them for us. what a good idea!
tworedbowls
It’s so easy, Trisha! And I really think I prefer the homemade version to storebought 🙂 Thanks so much for your kind words!
Yen
In southeast asia, we use glutinous rice flour. I don’t think it’s much different than sweet rice flour. We use palm sugar, sugar with peanuts, beans or any other sweets for fillings. But the way we cook it is by using boiling water. When the balls rise to the surface then it’s done. Let it cool and you can powder it with flour, sugar or coconut.
tworedbowls
Sounds delicious, Yen! 🙂 Yes, I do think glutinous rice flour is very similar (if not the same thing — I’ve never been able to figure that out!) I’ll have to try your method sometime.
Allison j
Quick clarification: the ingredient list uses only 2 tablespoons of sugar for each type of Mochi, but step 9 refers to 1/2 cup of sugar? Please clarify! Thanks!
tworedbowls
Ah, I’m so sorry!! I meant 2 tbsp of sugar! Thanks so much for catching that. It’s been corrected. 🙂
Nancy @ gottagetbaked
Your mochi and photos are gorgeous, Cynthia! And thanks for testing out the different methods. I always love posts like these because it takes the guess work out for the rest of us. And don’t apologize for posting two mochi recipes in a row. So long as its delicious, I have no complaints! 😉
Sugar and Cinnamon
Yay I’m so excited to make these!!
tworedbowls
Can’t wait to hear your thoughts if you try them!! :):)
Stephanie (@StephRussell26)
I lurrrrve mochi! Or really anything with red bean filling actually. I also like the mochi ice cream that you find at Asian markets. Did I mention I love mochi? 🙂 I’ve always enjoyed the texture of it. It really is comforting! Oh yum, now I need to make these. Dang it! 🙂 Great to meet you by the way! Love your blog!
Red bean Ice Cream Recipe
I like coconut flavor very much that’s why I also like your delicious red bean mochi balls.I have tried this recipe it was really awesome and your images are also very pretty.
Diana
I tried your recipe today and it didn’t work at all. It was too little and when I tried to form the balls, the dough couldn’t stretch and broke. I didn’t have fresh beans (I bought some cans with pre-made filling) and it was too liquid. I cooked it with the oil as you said and it still didn’t work. Then I tried to freeze it but it didn’t condense or harden.
I am sure it wasn’t your recipe but I really don’t know what happened.
Heeelp! 🙁
tworedbowls
Hi Diana,
I’m so so sorry that it didn’t work for you! It’s so sad when that happens 🙁 Can you tell me a little bit more about how you made the mochi? Did you microwave it or use the oven? Did you cover it while baking, and if so, how did you cover it, with a plate or with plastic wrap? It needs to be covered quite tightly in order for it not to dry out. If you did cover it and it was still too tough and didn’t stretch, it could be that it was microwaved for too long, or that it cooled too much before you tried to use it… It could also be that it was stirred for too long. Was it still warm when you worked with it, and how long did you stir it before you flattened it and tried to wrap filling with it?
As for the red bean filling, if you’re buying the canned version with whole beans, did you strain the syrup out first? Pre-cooked beans will have a lot more syrup to keep it preserved. Before cooking, pour the beans into a fine mesh strainer and strain the syrup out first — as dry as you can. Then mash and cook over oil. Does that make sense?
Hope that helps!! Keep me posted — I really hope it works next time if you give it another shot!
Diana
Thanks so much for answering!
I used the microwave, and I covered it with a plate (I didn’t think microwaving plastic wrap was a good idea either). When I took it out of the microwave, it wasn’t too hot but after mixing for a while, I thought that the consistency was just about right. When I worked with it, it was already pretty much room temperature. I guess I also made the mistake of making the dough first and then the filling. I guess it was already too dry or too cold to work with. Although at the beginning when I tried to flatten it out, it stuck too much to my fingers and I guess I put too much water on my hands for the dough not to stick and it got watered down or something.
The can of red bean filling that I had bought was already kind-of mashed. I tried to blend it a little but it wasn’t enough for the blender blades to reach.
I guess knowing all of this know will help for when I try next time!
Thanks a lot,
Diana 🙂
Lisa
I soak the red bean for 3 hours then cook it in rice cooker. Usually need to cook it twice to reach the more creamer paste.