
For as long as I can remember, hazelnut coffee has been my dad’s way to start the day. Almost every day of my childhood and every day that I’m back home now, I’ve come downstairs in the morning to find him sitting in our sunny breakfast nook, already up for hours, with an oversized mug of coffee in his hand and a newspaper spread out on the table, his glasses beside it. His coffee is always the same, a spoonful of sugar and a heavy-handed pour of hazelnut Coffeemate that he stirs in with a chopstick until his coffee turns a creamy, tawny beige.
My dad’s love for cheesecake has been equally constant: In the summers that I spent tagging along with him to his oncology lab, we almost always came back from lunch in the hospital cafeteria with a narrow slice of cheesecake, perched in a plastic clamshell with a small dollop of cherry sauce on top, which we’d share in his office before he went back to work (and I went back to drawing pictures on his whiteboard or whatever it was that I did to pass the time).
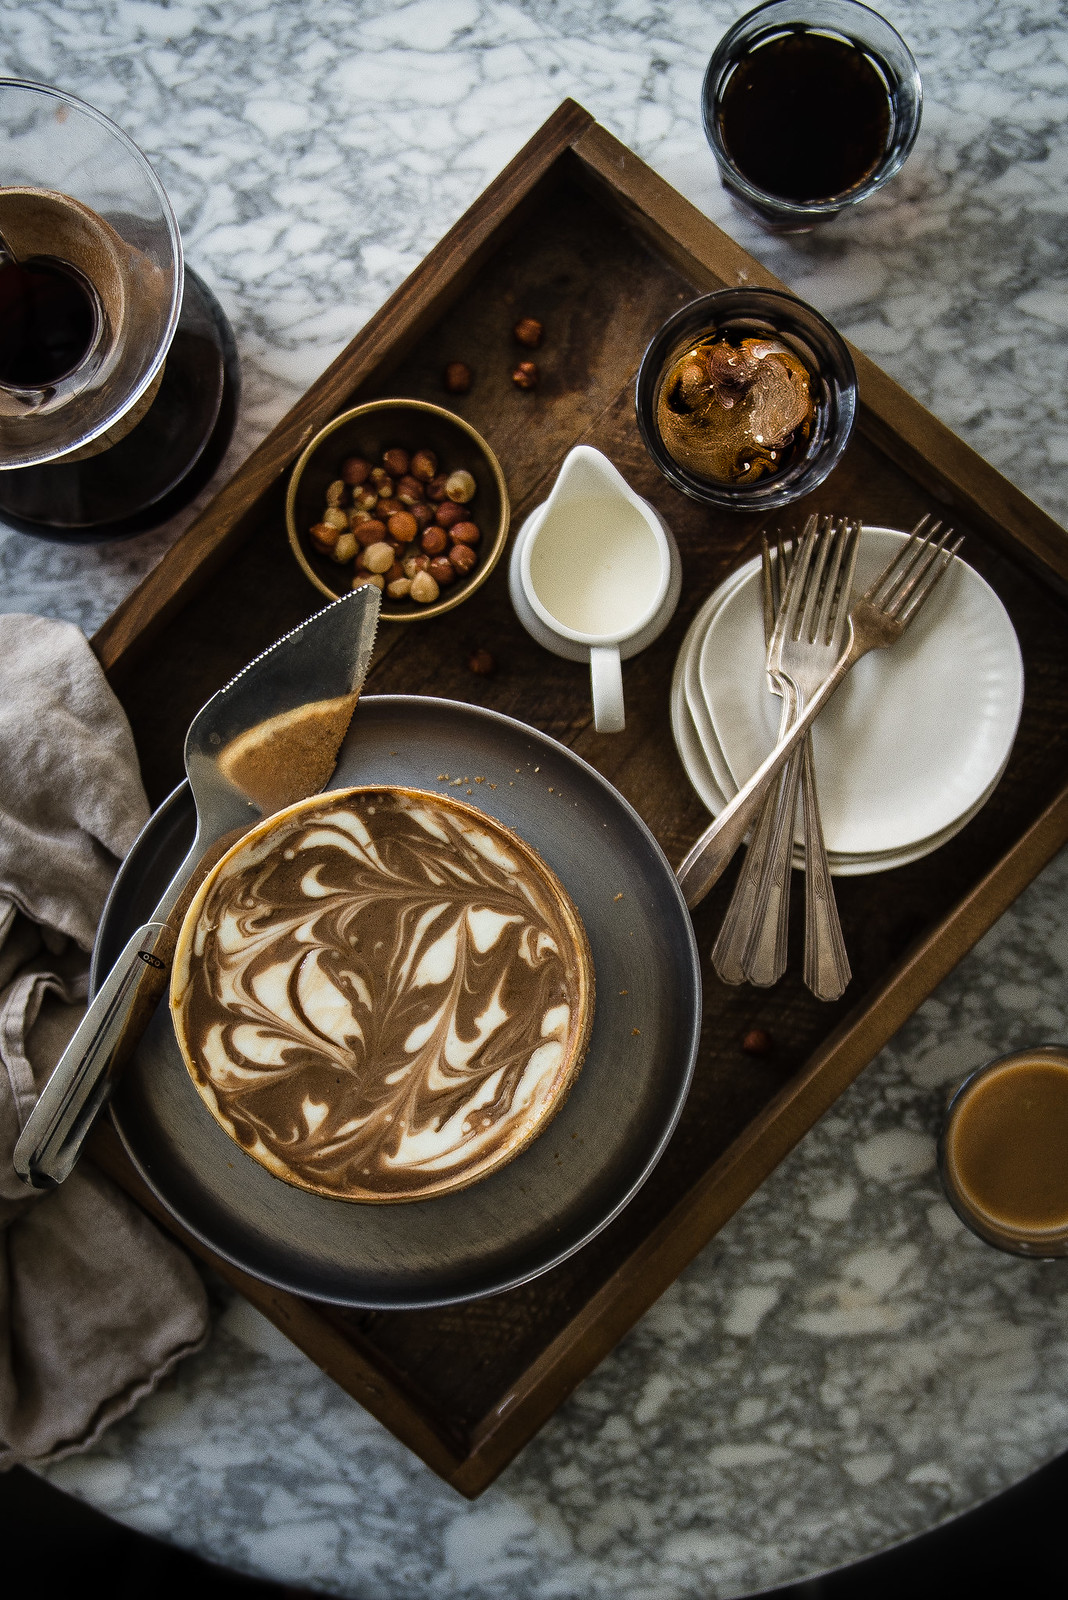

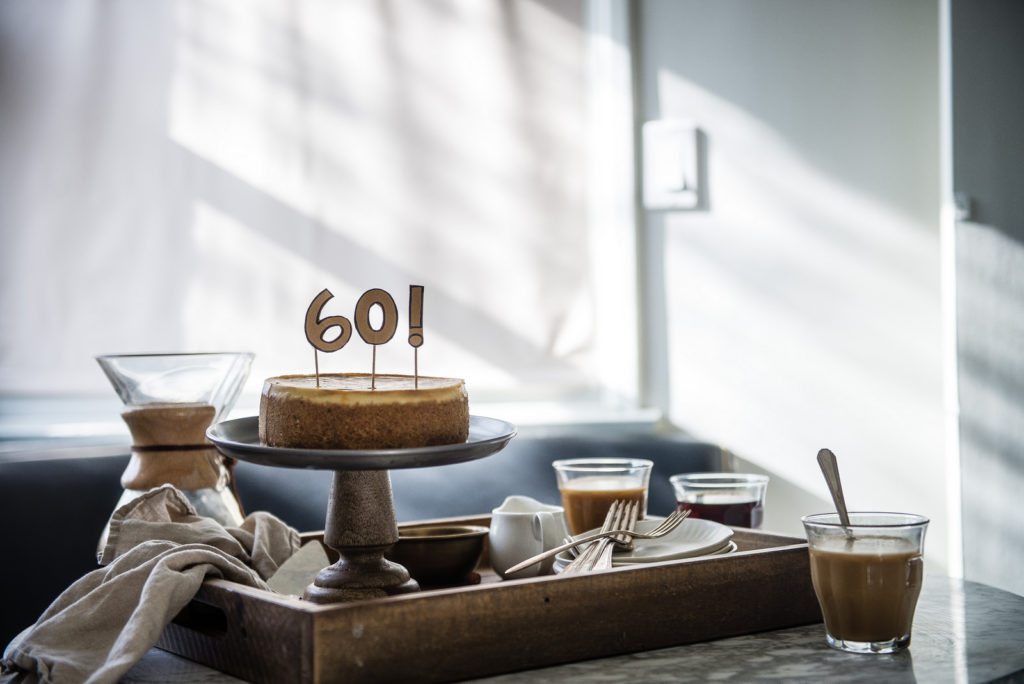
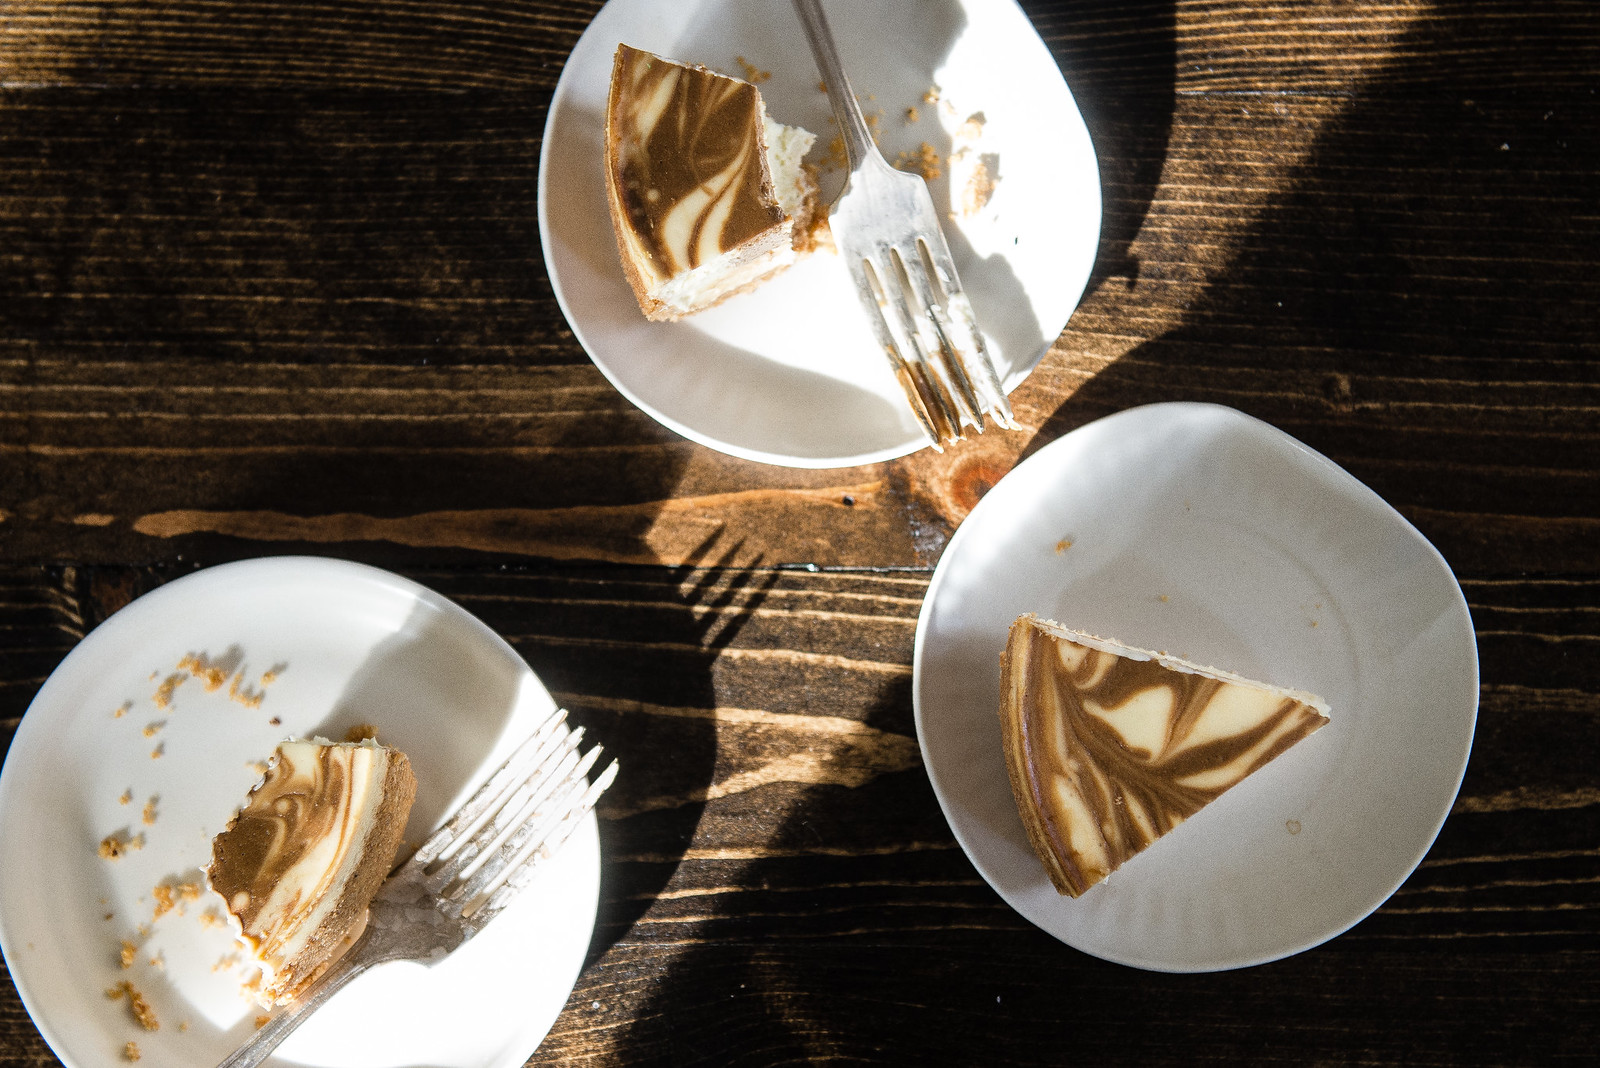
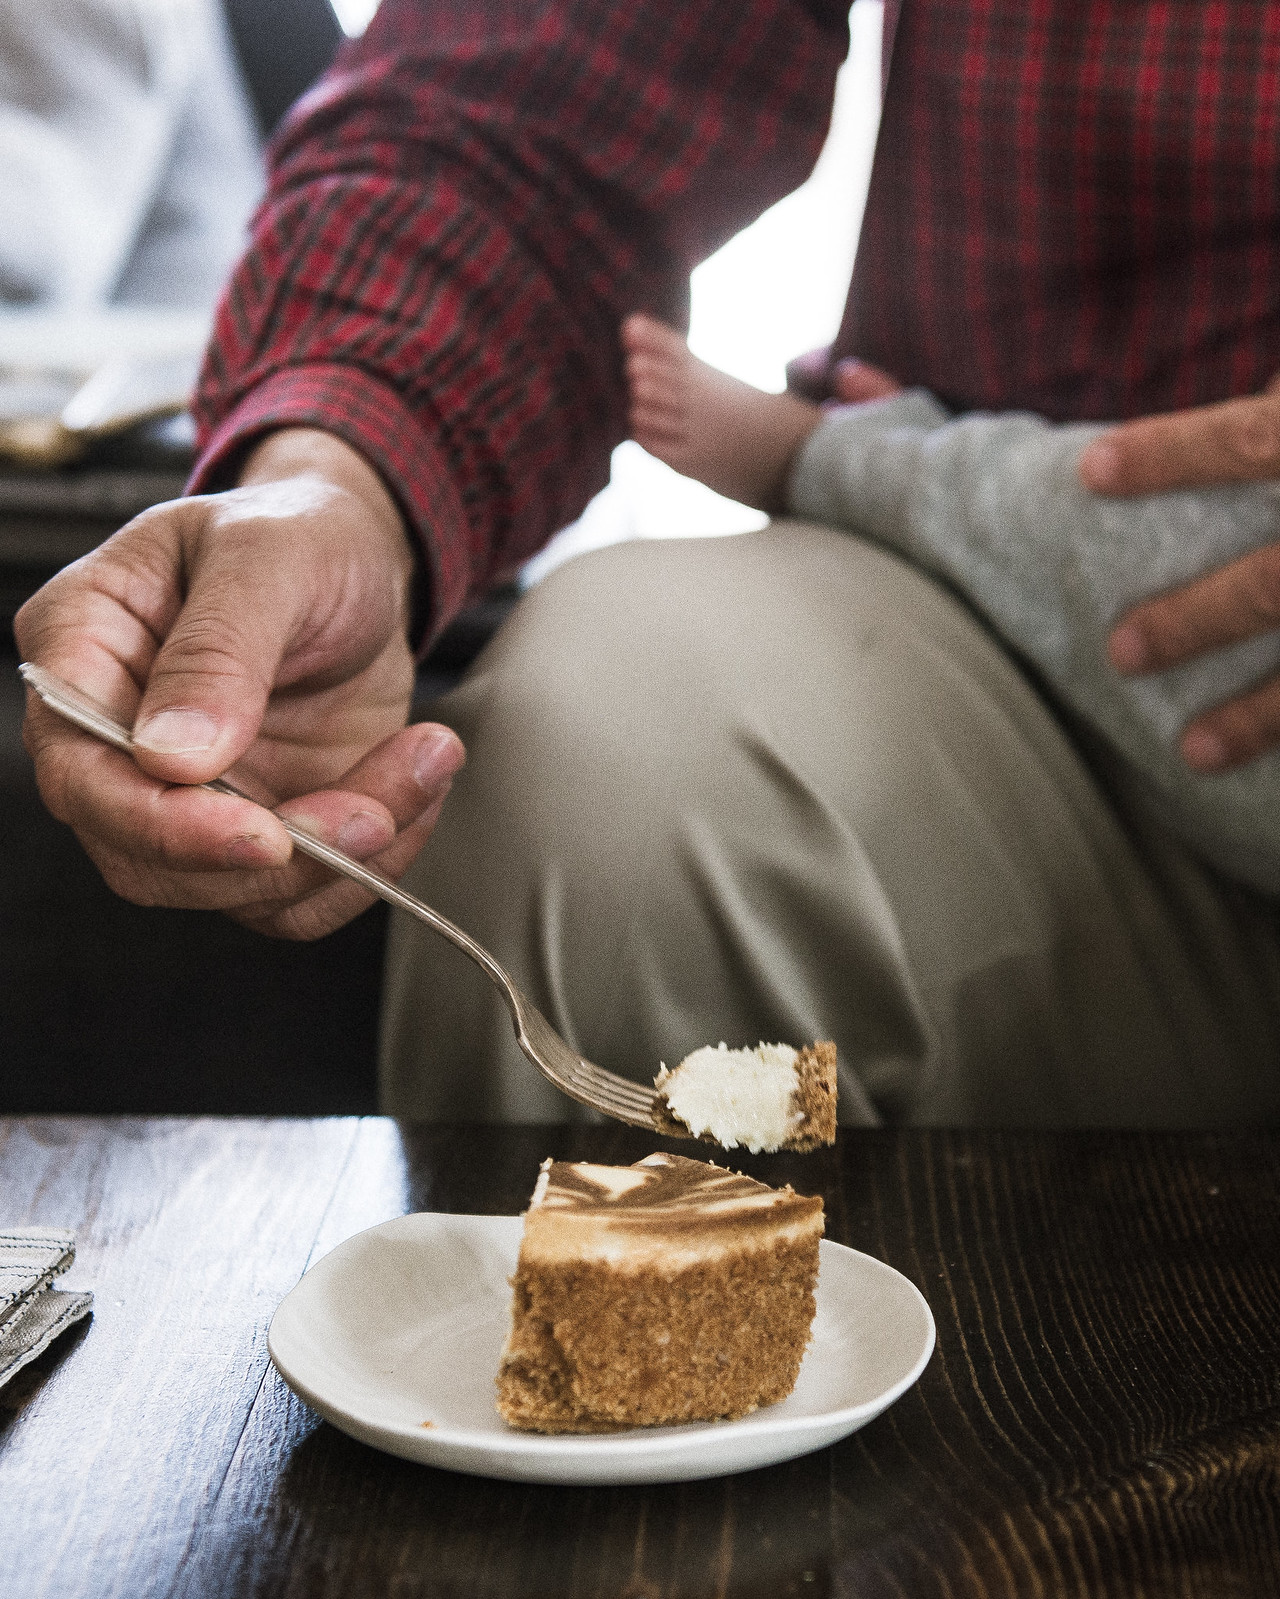
So, and I’m sure it’s predictable where this is going, when my dad’s 60th birthday rolled around last week and my family made plans to come spend it here with me and (the main attraction) my little potato-shaped bundle of chubby cheeks and teeny toes, a hazelnut coffee cheesecake went immediately on the menu. I have to confess that when it comes to cheesecake, I’m usually content throwing together the Philadelphia cream cheese cheesecake recipe and calling it a (very delicious) day. But it’s not every day that someone turns 60, so the recipe I turned to this time was a bit more special, from a cookbook I’ve been waiting to crack open since it came out: Sarah Kieffer’s impeccable new baking book. As I’m sure you know if you’ve tried any of Sarah’s recipes, her recipes are meticulously perfected and unfailingly delightful; for my first big-girl, water-bath(-or-similar, see below) and crack-the-oven-door-to-let-it-cool cheesecake, I couldn’t think of anything better. Her cheesecake is silky-smooth, creamy but not too heavy, with just the right balance between sweet and tang. I tweaked it just slightly to scale it down to a mini 6-inch cheesecake, and added ground hazelnuts and coffee-toasted butter for a hazelnut coffee twist to the graham cracker crust, plus a few teaspoons of espresso powder into a little bit of the filling for a coffee swirl on top. But the changes verge on gilding the lily — the cheesecake alone is perfection.
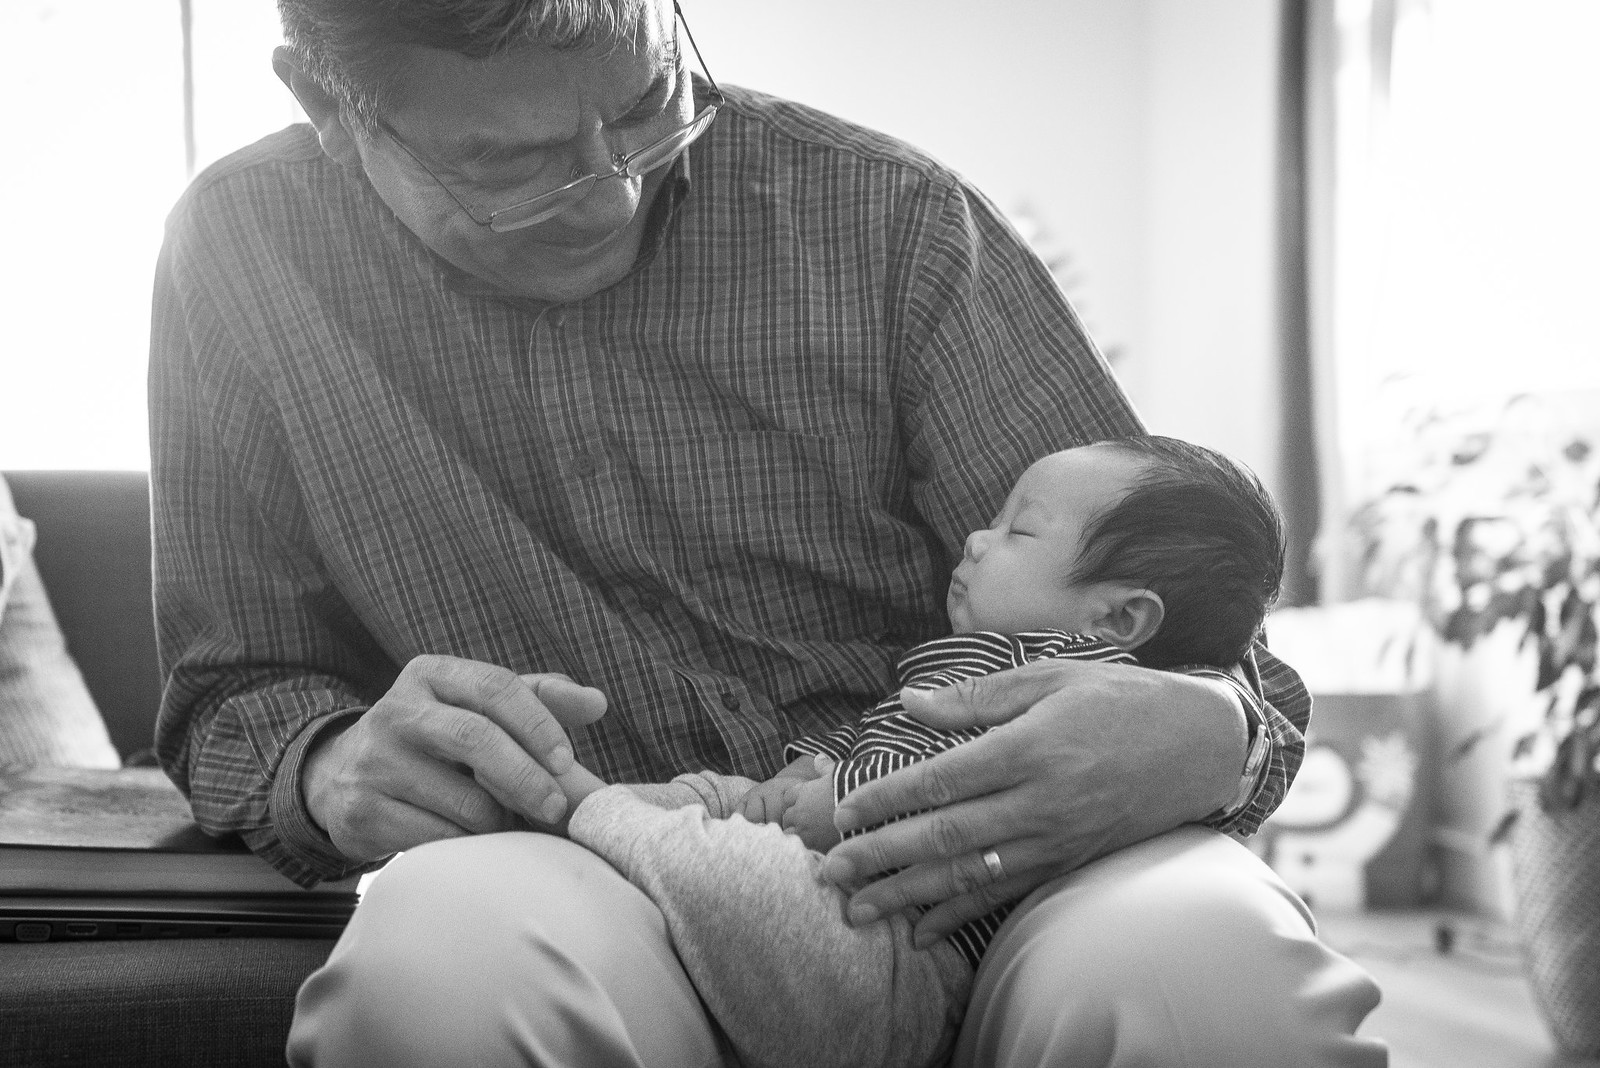
It’s not often that my dad gets a day that’s about him and not about everyone else in our family, despite all the mornings he was up before all of us, hazelnut coffee in hand, to make us breakfast and get our days going, and all the time and energy spent taking care of us, even when it meant taking us to work with him and juggling a career and us wee ones. I don’t think a mini cheesecake can express how grateful I am to have been able to celebrate his big 60th birthday with all of us together for the first time in years (a moment that our decision to move to LA this summer was all about). But this one is, I think, good enough to come close — especially when eaten while holding a roly poly new grandson in your lap. Happiest 60th to you, Dad!


Hazelnut coffee 6-inch cheesecake
Adapted from The Vanilla Bean Baking Book, by Sarah Kieffer. You can find the full 9-inch recipe here.
Ingredients
- for the crust:
- 3 tablespoons (1.5 ounces) unsalted butter
- 1 tablespoon coarse coffee grounds (optional)
- 1 cup graham cracker crumbs
- ¼ cup hazelnut meal or finely ground toasted hazelnuts
- 1 tablespoon granulated sugar
- for the filling:
- 1 pound (16 ounces) cream cheese, at room temperature
- ½ cup (3.5 ounces) granulated sugar
- 1 cup (8 ounces) sour cream, at room temperature
- ½ tablespoon pure vanilla extract
- ¼ teaspoon kosher salt
- 1 tablespoon unsalted butter, melted and cooled
- 2 large eggs, at room temperature
- 2 teaspoons instant espresso powder
- 1 teaspoon hot water or milk
- ¼ teaspoon hazelnut extract (optional)
Instructions
- For the crust: Adjust an oven rack to the middle position. Preheat the oven to 325 F. If making the coffee butter, place the butter and coffee grounds in a small saucepan over medium-low heat and swirl until the butter is melted. Strain out the coffee grounds through a fine mesh sieve and set aside. Whisk the graham cracker crumbs, hazelnut meal, and sugar in a medium bowl. Add the melted butter and mix with a spatula until evenly incorporated. Press the mixture onto the bottom of a 6-inch springform pan and bake 10 minutes. Remove from the oven and let cool. After the pan has cooled, wrap just the sides of the pan in two layers of aluminum foil, with the shiny side facing out (this helps keep the sides of the cheesecake from browning).
- For the filling: In the bowl of a stand mixer fitted with a paddle, beat the cream cheese on medium until light, fluffy, and completely smooth, about 4 to 5 minutes. Scrape down the bowl repeatedly, making sure that by the end every tiny speck of cream cheese is silky smooth. Add the granulated sugar and beat on medium for 2 to 3 minutes. Add the sour cream, vanilla, and salt and beat on medium for 2 to 3 minutes. Add the butter and mix on low until combined. With the mixer running on medium, add the eggs one at a time, beating after each addition just until combined and stopping to scrape down the sides of the bowl as needed. Using a spatula, give the filling a couple turns to make sure it is fully mixed. (Note: Being without a stand mixer, I used an electric hand mixer for all the mixing and found it worked well.)
- In a small bowl, dissolve the espresso powder in a teaspoon of hot water or milk. Add about ½ cup of the cheesecake filling to the espresso mixture and mix until fully incorporated.
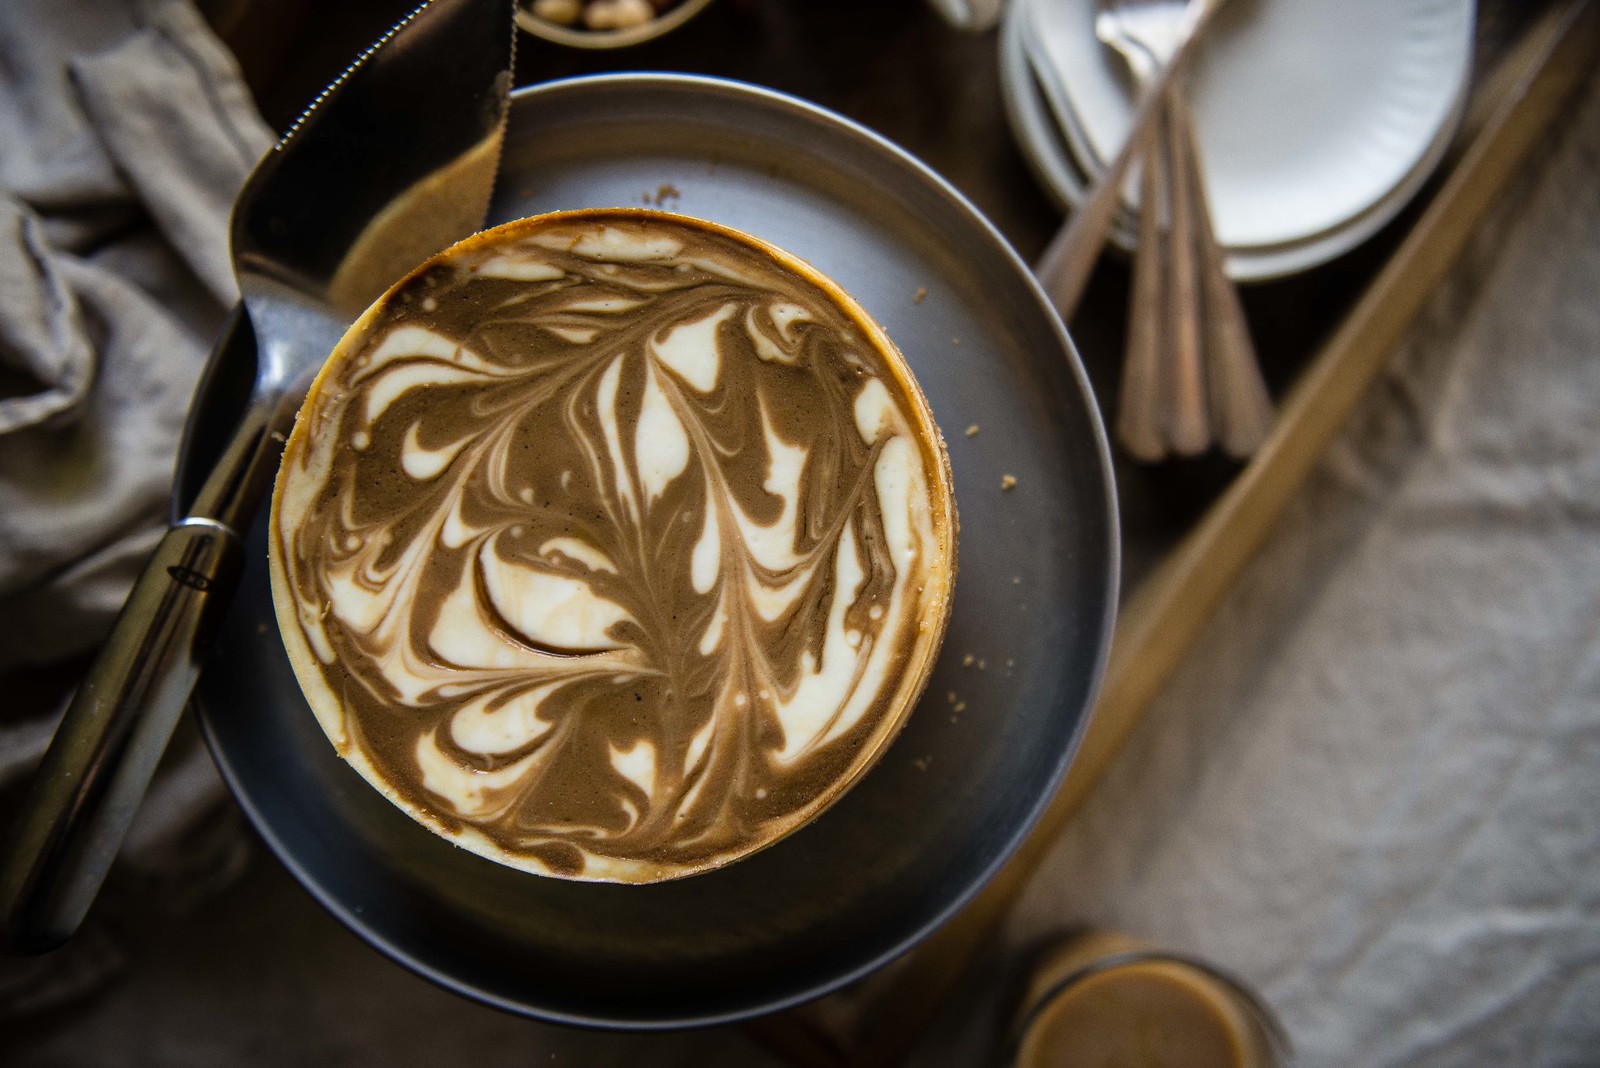
- Pour the regular cheesecake filling over the cooled crust and use an offset spatula to smooth the filling evenly across the pan. Dollop the espresso filling across the regular filling and run a butter knife through the dollops to make a swirl pattern. Bang the bottom of the springform pan on the counter to help get rid of any air bubbles. Sarah notes that she does this quite a few times, until most of the air bubbles on the surface pop.
- Set a roasting pan on the floor of the oven and fill it with 4 quarts of warm water. Place the springform pan on the oven rack and bake for 1 hour without opening the door. (You may want to check on the cheesecake starting at 45 minutes, however; see Notes.) The outer ring (2 to 3 inches) of the cheesecake should be slightly puffed and fairly firm, and the center should be set but still a bit jiggly when wiggled gently, resembling Jell-O. If the outer ring isn’t firm, let the cheesecake bake for another 10 to 15 minutes. If it is done, turn off the heat, open the oven door just a crack, and let the cheesecake rest and cool in the warm, humid oven for 30 minutes.
- Transfer the pan to a wire rack and let cool 5 to 10 minutes. Remove the foil from the pan, and carefully run a thin knife or offset spatula around the border of the cake to help loosen it from the pan. Once the cake is completely cool, place a piece of parchment paper over the top of the pan (to keep condensation off the top of the cheesecake) and transfer to the refrigerator. Let chill at least 6 hours or overnight.
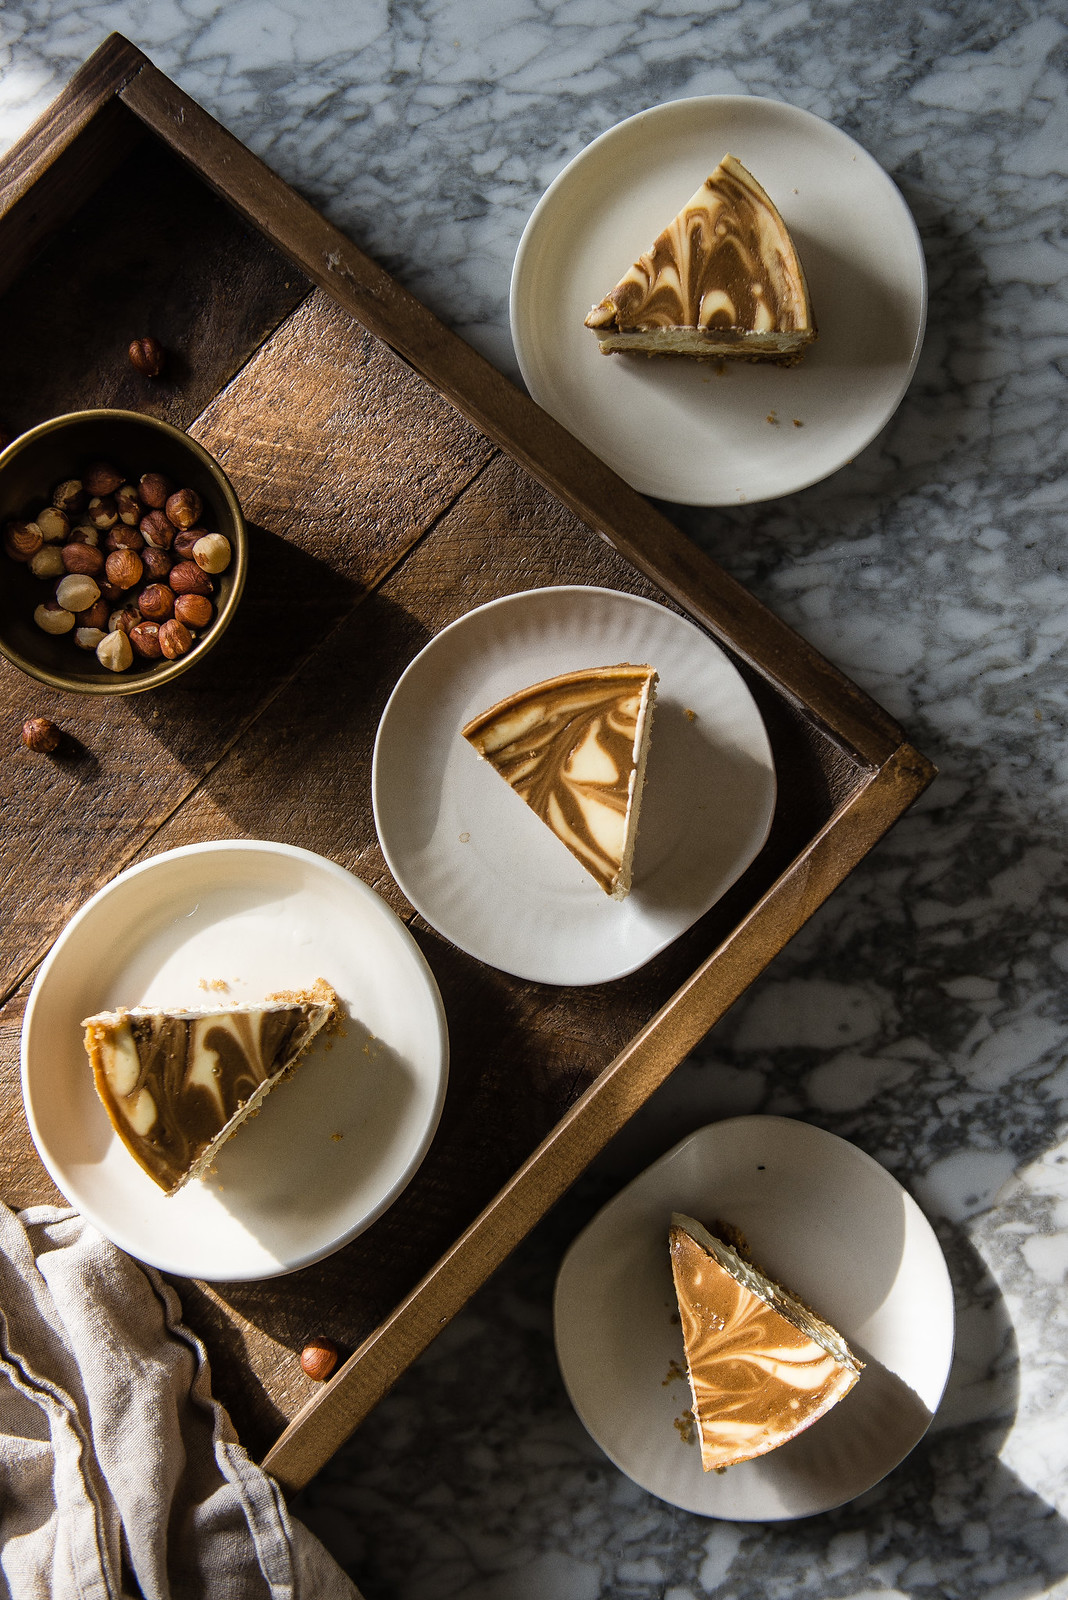
- To remove the cheesecake from the pan, run a thin, offset spatula between the sides of the cake and the pan and then gently remove the sides. Slide the spatula between the bottom of the crust and the pan to loosen and then carefully slide the cheesecake onto a serving plate. Let the cheesecake come to room temperature before serving. Enjoy!
Notes
You’ll really only need a small amount of coffee filling to swirl on top of a 6-inch cheesecake, given its smaller size — something I didn’t realize! If you end up with extra coffee filling, you can do as I did, and bake the extra in a cupcake tin.
Note that this recipe calls for the same baking time as the full 9-inch version — I found that this was the case in my oven, at least, but in case it’s not the same for you, you may want to start checking your cheesecake around 45 minutes.
Fran
What a sweet picture of your Dad with his precious Grandson. Your Baby is adorable..
Tori//Gringalicious.com
Sounds divine! I have a major addiction to hazelnut coffee myself, so I know I’d love this cheesecake!
Michelle || Hummingbird High
those coffee swirls look PERFECT. love this post so much; it made me smile! glad you’re spending time with your family. xo
Erica
Totally stunning. My favorite recipes always stem from good childhood memories. I hope you are having a warm and wonderful holiday season, Cynthia! Sending you all the best wishes <3
Sara @ Cake Over Steak
Aw, what a sweet way to celebrate your dad! I’m not a cheesecake person, but Sarah’s sounds amazing and I love your hazelnut coffee twist to it.
heather (delicious not gorgeous)
so many good things going on: swirls, hazelnut coffee swirls, cute potato bundles, dads. and love that you made this as a mini cheesecake; usually i mean to share what i bake with others, but sometimes it just stays in my house, and then oops we ate half of it already. so a 6″ is less damaging than a 10″ (;
Ala
The happiest of bdays to your dad!! I love this post so much–it reminds me of my own dad getting up every day to help kickstart our days, and even now he never likes to have a fuss made about him…he just likes to do things quietly from behind the scenes. Thank you for sharing this wonderfully inspired recipe and post! Also, I keep forgetting that LA is your new hometown too now <3 yayyy~ happy holidays, lady!
Sweet Tea Sweetie
What a beautiful cheesecake!
Kari
http://sweetteasweetie.com
sylviacugliani
That is the absolute sweetest photograph of your dad holding your sleeping potato bundle on his lap! I hope you frame it! In fact, make prints!!! And wish him a most happy birthday for me!
Marta @ What should I eat for breakfast today
All the best wishes for your dad. The last picture is my favourite <3
Angela
What an amazing cheesecake! This is such a fabulous idea. Happy birthday to your dad too!
almost properly
That flavor combo sounds like HEAVEN!!! Hazelnuts are my favorite and give everything such a fabulous flavor!! Also, your swirls on the top are perfection!!
Edlyn
This makes me miss my dad and drool at the same time. My dad is much like yours, in how you describe him (replace coffee with tea) so i totally get your family’s joy at getting to be close by again. It’s truly wonderful and I’m happy for you.
Erika
Omg that last pic is the sweetest. My heart is exploding <33333
Victoria
This cheesecake is drop dead gorgeous. The marbling, the flavor combinations. Love the 6 in size. Been looking for a 6 inch cheesecake to make for my husband’s birthday in about a week. We both love coffee so i think this is the one! I’ll try to leave another comment after making it so others can see how it turned out
StacY
If I don’t have hazelnuts or hazelnut meal do I substitute the same amount of cookie crumbs?
Zehra
I was meaning to leave a feedback but somehow missed where i had this recipe from. Today when i skipped the my recipe book i quickly jumped on your site! Here I am writing a review i had no clue there wasn’t any reviews! And im the first one to actually review it:)
Well in all honesty i have been making this cheesecake since 2019 when my husband desperately wanted a coffee kick n what best for his bday! He was instantly in love with it n so was I n my kids hahaa……. all i did differently was instead of the swirl i made more coffee batter n spread a layer of coffee cheesecake n plain
It is amaaaazing thank you for sharing such a wonderful recipe x
★★★★★
Brenda Milcetic
Hi Cynthia,
Your cheesecake looks and sounds amazing! I am wanting to make this for our brother Murray’s 64th birthday. 💞
Your recipe reads to spread Graham wafer crust on the bottom of the pan. However your beautiful pictures show the crust coming up high along the sides of the cheesecake pan. If the latter is the case how do I go about making the sides as perfectly as you did?
Thank you,
Brenda
Brenda Milcetic
Hi Cynthia,
I posted a question on March 30th regarding this 6″ Hazelnut Chocolate Cheesecake. Just wondering if you received the post?
Thank you,
Brenda
tworedbowls
Hi Brenda, I’m so sorry I missed this when you first commented! You’re totally right that I should have specified–sometimes I do just the bottom crust and sometimes I do the sides, and for the sides I just use my fingers to press the crust into the sides of the pan, and just make sure to press firmly. You can also use the rounded sides of a measuring cup or a glass. I hope you enjoyed this if you ended up making it, and happy belated birthday to your brother!